Few things send a wave of panic through a site owner faster than making a quick configuration change only to be met with a stark “500 Internal Server Error” across their entire site. If you have spent any time maintaining, troubleshooting, or optimizing a WordPress site, chances are you have encountered the mysterious .htaccess file. It is often blamed for sudden site crashes, yet it is also the key to resolving broken permalinks, enforcing secure HTTPS connections, hardening your site’s security, and managing high-performance redirects.
As a senior WordPress developer, I have seen countlessly damaged sites caused by a single misplaced space or syntax error in this file. However, once you understand how the .htaccess file works and adopt a safe editing workflow, it becomes one of the most powerful and effective tools in your server configuration arsenal. In this comprehensive guide, we will break down what the .htaccess file actually does, where to find it, how to edit it safely without crashing your site, and the essential code snippets every WordPress administrator should know.
What Is the WordPress .htaccess File?
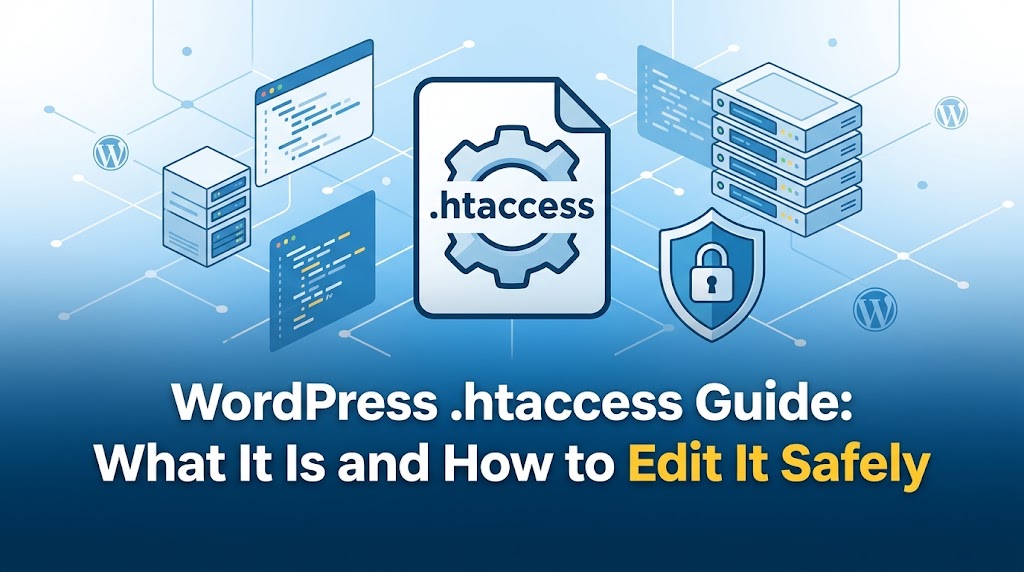
The term .htaccess stands for “Hypertext Access.” It is a directory-level configuration file supported by Apache and Apache-compatible web servers (such as LiteSpeed). When a visitor or search engine crawler requests a page on your website, the Apache web server reads the instructions inside the .htaccess file before it serves any content or executes PHP scripts.
Because it operates at the server level, directives placed inside .htaccess execute extremely fast—long before WordPress even loads its core PHP codebase or connects to your MySQL database. This makes it an exceptionally efficient location for high-priority routing rules, security restrictions, and server environment tweaks.
Notice the leading period (dot) in the file name (.htaccess). In Unix-based operating systems (like Linux, which powers the vast majority of web hosts), any file starting with a dot is treated as a hidden system file. This prevents casual visitors from downloading server configuration files, but it can also make the file tricky to locate if your FTP client or file manager is configured to hide system files.
What Causes .htaccess Issues and Why Do You Need to Edit It?
Why do you need to touch this hidden server file in the first place? In a standard WordPress installation, WordPress handles its own rules automatically. However, several real-world maintenance tasks, site updates, and server errors require direct intervention within the file.
Here are the primary root causes and triggers that require interacting with or modifying your .htaccess file:
- Corrupted Rewrite Rules (404 Errors): If you suddenly see “404 Not Found” errors across all your posts and pages while your homepage works fine, your rewrite rules in
.htaccesshave likely been corrupted or erased. - Internal Server Errors (500 Error): A single syntax mistake, incompatible server module, or corrupted string added by a plugin can cause Apache to throw a 500 Internal Server Error, locking you out of your entire site.
- Setting Up 301 Redirects: When changing page URLs, migrating to a new domain, or restructuring your site, creating server-level 301 permanent redirects in
.htaccessis much faster and cleaner than running heavy PHP-based redirection plugins. - Enforcing SSL (HTTPS): After installing an SSL certificate, forcing all non-secure HTTP traffic to route through HTTPS is most efficiently handled right at the
.htaccesslevel. - Hardening WordPress Security: You can block malicious IP addresses, disable directory browsing, block hotlinking of images, and restrict access to critical files like
wp-config.phpandxmlrpc.php. - Increasing Server Limits: Sometimes custom configurations require adjusting PHP execution limits, maximum upload file sizes, or post sizes directly via server directives.
Where Is the WordPress .htaccess File Located?
The primary .htaccess file resides in the root directory of your WordPress installation. This is typically named public_html, www, htdocs, or your specific domain name folder inside your hosting account.
It is worth noting that subdirectories can also contain their own independent .htaccess files. Directives in subfolders inherit rules from the parent directory but can override them for that specific folder. For example, your /wp-content/uploads/ folder might have its own .htaccess file restricting PHP script execution for enhanced security.
What to Do If You Can’t Find the File
If you log into your site via FTP or cPanel and cannot find the .htaccess file, it usually boils down to one of two reasons:
- The file is hidden: Your file transfer client or server file manager is hiding dotfiles by default. You must enable “Show Hidden Files” in your software settings.
- The file does not exist yet: If your site was newly installed or your permalink settings were never updated from the “Plain” default structure, WordPress may not have generated the file yet.
To generate a fresh .htaccess file automatically from your WordPress dashboard:
- Log into your WordPress admin panel.
- Navigate to Settings > Permalinks.
- Without changing anything, click the Save Changes button at the bottom of the page.
This action forces WordPress to inspect your root directory and automatically generate a fresh, properly formatted .htaccess file with the correct default rewrite rules.
How to Edit the .htaccess File Safely (Step-by-Step Solutions)
Editing your .htaccess file without precautions is like performing open-heart surgery without a safety monitor: one small syntax error, a missing character, or an unsupported module directive will crash your entire web server instantly. Follow these battle-tested developer workflows to edit your file safely.
The Cardinal Rule: Always Create a Backup First
Before you open any editing tool, create an exact copy of your existing, working .htaccess file on your local machine. Name it something clear, such as .htaccess_BACKUP_YYYY-MM-DD. If your site crashes after saving changes, you can immediately overwrite the broken file with your backup to restore site functionality within seconds.
Method 1: Editing via FTP/SFTP (Recommended for Developers)
This is the safest, most reliable approach because it gives you direct file system access even if your WordPress admin dashboard completely breaks.
Step 1: Connect to your site via FTP/SFTP.
Open your preferred FTP client (such as FileZilla, Cyberduck, or Transmit) and log into your server using your SFTP or FTP credentials.
Step 2: Enable hidden files.
In FileZilla, go to the top menu and select Server > Force showing hidden files. This ensures that dotfiles like .htaccess are visible in the directory list.
Step 3: Download a backup copy.
Navigate to your main WordPress folder (usually public_html). Locate .htaccess, right-click, and download it to your local computer desktop.
Step 4: Edit the file in a plain text editor.
Open the local file using a proper code editor such as Visual Studio Code, Sublime Text, or Notepad++. Never use rich-text editors like Microsoft Word or TextEdit (in rich text mode), as they insert smart quotes, formatting characters, and hidden UTF byte order marks that corrupt server files.
Step 5: Save, upload, and test.
Save your changes in the code editor, upload the updated .htaccess back to your server’s root folder, and immediately open your website in a private/incognito browser window to verify functionality.
Method 2: Editing via cPanel File Manager
If you prefer using a web-based portal, host management panels like cPanel allow direct editing through your web browser.
Step 1: Log into your hosting account cPanel and open the File Manager.
Step 2: In the top-right corner, click Settings. Make sure the checkbox for Show Hidden Files (dotfiles) is checked, then click Save.
Step 3: Navigate to your public_html directory. Find .htaccess, right-click, and choose Copy or Download to create an immediate backup.
Step 4: Select the .htaccess file and click Edit in the top toolbar. Make your modifications carefully, click Save Changes, and test your site immediately.
Method 3: Editing via WordPress Plugins (Use with Caution)
Some SEO and security plugins—such as Yoast SEO, Rank Math, or dedicated File Manager plugins—allow you to edit .htaccess directly inside the WordPress dashboard.
Developer Warning: While convenient, editing .htaccess inside WordPress carries inherent risk. If you make a syntax error and save, the server will trigger a 500 error, immediately locking you out of the WordPress dashboard. You will still need FTP or cPanel access to repair the damage. Use this method only if you have active FTP/cPanel access on standby.
Understanding the Default WordPress .htaccess Code
When you install WordPress and configure pretty permalinks (like example.com/sample-post/), WordPress writes a standard set of routing directives into your .htaccess file. This basic block directs incoming web traffic to index.php, enabling WordPress to dynamically parse requested URLs and load the correct post or page.
Here is the exact default code for a standard WordPress single-site installation:
# BEGIN WordPress
# The directives (lines) between "BEGIN WordPress" and "END WordPress" are
# dynamically generated, and should only be modified via WordPress filters.
# Any changes to the directives between these markers will be overwritten.
<IfModule mod_rewrite.c>
RewriteEngine On
RewriteRule .* - [E=HTTP_AUTHORIZATION:%{HTTP:Authorization}]
RewriteBase /
RewriteRule ^index.php$ - [L]
RewriteCond %{REQUEST_FILENAME} !-f
RewriteCond %{REQUEST_FILENAME} !-d
RewriteRule . /index.php [L]
</IfModule>
# END WordPress
Important Rule: Do NOT manually edit anything inside the # BEGIN WordPress and # END WordPress markers! WordPress regularly rewrites this block when plugins update or when you re-save Permalinks. Place any custom code, redirects, or security rules above # BEGIN WordPress or below # END WordPress.
Essential .htaccess Snippets for WordPress Site Owners
Now that you know how to safely edit your .htaccess file, let’s explore practical, developer-approved code snippets that enhance site security, enforce canonical URLs, and optimize performance.
1. Force All Traffic to HTTPS (SSL)
Once an SSL certificate is active on your server, paste this rule at the very top of your .htaccess file to automatically route all non-secure HTTP traffic to secure HTTPS:
<IfModule mod_rewrite.c>
RewriteEngine On
RewriteCond %{HTTPS} off
RewriteRule ^(.*)$ https://%{HTTP_HOST}%{REQUEST_URI} [L,R=301]
</IfModule>
2. Protect Critical Files (wp-config.php and .htaccess)
Your wp-config.php file contains sensitive information, including database credentials and security keys. Protect both your configuration file and your .htaccess file from external web access with these blocking directives:
# Protect wp-config.php
<Files wp-config.php>
order allow,deny
deny from all
</Files>

# Protect .htaccess
<Files ~ "^.*.([Hh][Tt][Aa])">
order allow,deny
deny from all
satisfy all
</Files>
3. Disable Directory Browsing
By default, if an index file (like index.php or index.html) is missing from a server folder, Apache will display a full listing of all files inside that directory to the browser. Malicious actors use this behavior to discover vulnerable plugin files. Disable directory browsing globally by adding this simple line:
# Disable Directory Index Browsing
Options -Indexes
4. Set Up Permanent 301 Redirects
If you change a post’s URL structure or delete an old page, you can pass SEO link equity and seamlessly route users to the new page using a fast, server-level 301 redirect:
# Redirect a single page
Redirect 301 /old-page-url/ https://example.com/new-page-url/

# Redirect an entire legacy domain to a new domain
<IfModule mod_rewrite.c>
RewriteEngine On
RewriteCond %{HTTP_HOST} ^olddomain.com$ [NC]
RewriteRule ^(.*)$ https://newdomain.com/$1 [R=301,L]
</IfModule>
5. Restrict Access to the WordPress Login Page by IP Address
If you manage a business site with a static IP address, you can virtually eliminate brute-force login attacks by restricting access to wp-login.php to strictly authorized IP addresses:
# Protect wp-login.php by IP
<Files wp-login.php>
order deny,allow
deny from all
# Replace with your actual office/home static IP address
allow from 123.456.78.90
</Files>
6. Disable XML-RPC Functionality
WordPress includes an API interface called xmlrpc.php designed for legacy remote publishing applications. Unfortunately, it is heavily targeted by automated botnets for brute-force login attacks and DDoS amplification vectors. If you do not rely on third-party mobile publishing apps or Jetpack, disable access to this script entirely:
# Block WordPress XML-RPC requests
<Files xmlrpc.php>
order deny,allow
deny from all
</Files>
7. Increase PHP Upload Limits via Server Rules
If your web host supports configuring PHP parameters through Apache directives, you can raise maximum media upload and memory limits right in .htaccess:
# Adjust PHP execution limits
php_value upload_max_filesize 64M
php_value post_max_size 64M
php_value max_execution_time 300
php_value max_input_time 300
Note: If adding these lines causes a 500 Internal Server Error, your host runs PHP under SuPHP, FastCGI, or FPM mode, which does not allow php_value flags inside .htaccess. Simply remove those lines to clear the error.
Troubleshooting: How to Fix a Broken Site After Editing .htaccess
If you edited your .htaccess file, refreshed your browser, and were greeted by a dreaded 500 Internal Server Error or a blank white screen, don’t panic! This is a standard right of passage for every developer. It simply means Apache encountered a syntax command it did not recognize or understand.
Follow these steps to restore your site immediately:
- Access your server immediately via FTP or cPanel File Manager.
- Locate the modified
.htaccessfile in your root folder. - Rename the broken file: Change the filename from
.htaccessto.htaccess_broken. - Test your website: Refresh your web browser. Renaming the file stops Apache from reading the broken directives, instantly resolving the server error.
- Restore a known clean copy: Upload your original unedited backup copy and rename it back to
.htaccess, OR log into your WordPress Dashboard and go to Settings > Permalinks and click Save Changes to generate a clean default file. - Isolate the error: Inspect your custom snippets line by line. Did you forget a closing tag like
</IfModule>? Did you paste code inside the WordPress default auto-generated block? Re-introduce your custom rules one line at a time to isolate the exact directive causing the failure.
Prevention Tips for Safe .htaccess Management
Preventing site downtime is always easier than emergency repairs. Integrate these best practices into your site maintenance routine to ensure safe, zero-downtime updates:
- Keep an offline archive of backups: Store labeled backups (e.g.,
htaccess-working-2026.txt) on your local hard drive or cloud storage before making major configuration changes. - Make incremental changes: Never paste massive blocks of custom configuration code all at once. Add one rule set, save the file, test your website thoroughly, and then proceed to the next modification.
- Avoid editing in WordPress admin: Always prefer FTP/SFTP or cPanel File Manager over internal plugin editors. If an internal plugin editor crashes your site, you will lose dashboard access anyway.
- Verify Server Modules First: Many rules require specific Apache modules (such as
mod_rewrite,mod_deflate, ormod_headers). Always wrap directives in module checks (e.g.,<IfModule mod_rewrite.c> ... </IfModule>) so Apache gracefully ignores commands if the module is inactive on your server. - Check File Permissions: The standard secure file permission setting for
.htaccessis 644 (Read/Write for owner, Read for group/others). Avoid setting it to 777, which leaves your server configuration vulnerable to malicious script execution.
Conclusion
The .htaccess file is one of the most versatile and impactful files in your WordPress site directory. While its power to instantly take a site offline can make it intimidating to non-technical users, working with it doesn’t have to be a gamble. By keeping fresh backups, leveraging secure code editors, utilizing proper FTP workflows, and following the safe execution steps covered in this guide, you can confidently customize, secure, and speed up your WordPress site without fear.