Images are one of the most common reasons a WordPress website becomes slow.
Large photos, oversized images, inefficient formats, unnecessary thumbnails, and poorly configured loading behavior can increase page weight and make visitors wait longer for a page to become usable.
The good news is that you usually don’t need to remove images to make a WordPress website faster. The goal is to deliver appropriately sized, efficiently compressed images at the right time.
In this guide, you’ll learn how to optimize WordPress images for performance, including image dimensions, compression, WebP and AVIF, responsive images, lazy loading, CDN delivery, and Core Web Vitals.
Why Images Make WordPress Websites Slow
A modern WordPress page can contain many different types of resources:
HTML
CSS
JavaScript
Fonts
Images
Videos
Third-party scripts
Images can account for a significant portion of the total page size.
For example, imagine a page containing:
Hero image       2.5 MB
5 content images 4.0 MB
Logo             150 KB
Icons            100 KB
----------------------
Images           6.75 MB
The page may still work perfectly, but visitors on slower mobile connections have to download several megabytes before they can fully interact with the page.
Reducing unnecessary image data can therefore improve loading performance.
The Most Important Image Optimization Steps
For most WordPress websites, start with these:
- Resize images to appropriate dimensions.
- Compress images before or during upload.
- Use modern formats such as WebP or AVIF where appropriate.
- Let WordPress generate responsive image sizes.
- Avoid loading unnecessarily large images.
- Lazy-load images that aren’t immediately visible.
- Prioritize important above-the-fold images.
- Use a CDN when it makes sense.
- Remove unnecessary image sizes and thumbnails.
- Test the actual page instead of optimizing images blindly.
Let’s look at each one.
1. Resize Images Before Uploading
One of the most common mistakes is uploading a huge image and allowing WordPress to display it at a much smaller size.
For example:
Original image:
6000 × 4000 pixels

Displayed on website:
1200 × 800 pixels
The visitor may not need all 6000 pixels.
If an image will never be displayed larger than 1200 pixels wide, uploading a 6000-pixel image can unnecessarily increase storage and processing requirements.
Before uploading an image, ask:
What is the largest size this image will actually be displayed at?
For a typical website, you might have something like:
Blog content:      1200–1600px
Featured image:    1200–1600px
Large hero image:  1600–2400px
Thumbnail:         Use WordPress generated size
Logo:              Use appropriate dimensions
These are starting points, not universal requirements.
The correct dimensions depend on your design and display size.
2. Don’t Upload a 5000px Image for a 600px Container
Consider a blog article where the content area is:
600px wide
but the uploaded image is:
5000px wide
Even if the browser eventually displays it at 600px, you may still be downloading significantly more image data than necessary.
A better approach is to provide a size appropriate for the display.
This becomes especially important on mobile devices.
3. Use WordPress Responsive Images
Modern WordPress automatically generates multiple image sizes and can use responsive image attributes such as:
srcset
sizes
A simplified example looks like:
<img
    src="image-768.jpg"
    srcset="
        image-300.jpg 300w,
        image-768.jpg 768w,
        image-1200.jpg 1200w
    "
    sizes="(max-width: 768px) 100vw, 1200px"
    alt="WordPress image optimization example"
>
The browser can then select an appropriate image resource based on the device and layout.
Important
Don’t manually remove srcset or replace WordPress’s responsive image handling unless you have a specific reason.
For most WordPress sites, the built-in responsive image functionality is useful and should be preserved.
4. Use the Correct Image Format
The image format you choose affects file size, quality, and browser compatibility.
Common formats include:
- JPEG
- PNG
- WebP
- AVIF
- SVG
Each format has different strengths.
JPEG
JPEG is still useful for photographs and complex images.
It generally works well for:
- Photos
- Blog images
- Landscapes
- Product photography
JPEG uses lossy compression, meaning some image information is discarded to reduce file size.
PNG
PNG can be useful when you need:
- Transparency
- Sharp graphics
- Screenshots
- Simple illustrations
However, PNG files can become very large when used for photographs.
If you’re uploading a large photograph as PNG, check whether another format would provide a significantly smaller file.
WebP
WebP provides both lossy and lossless compression and is widely supported by modern browsers.
It can often produce smaller files than JPEG or PNG for comparable visual quality.
For many WordPress websites, WebP is a practical modern format.
AVIF
AVIF is another modern image format that can provide very efficient compression.
Depending on the image, encoder, and quality settings, AVIF can produce smaller files than other formats.
However, the best format isn’t determined by file extension alone.
Always compare:
File size
+
Visual quality
+
Browser support
+
Your WordPress/image workflow
5. WebP vs AVIF
There isn’t one format that wins for every image.
For example:
| Format | Good for | Main consideration |
|---|---|---|
| JPEG | Photographs | Broad compatibility and simple workflow |
| PNG | Transparency/graphics | Can produce large files |
| WebP | General web images | Excellent modern web option |
| AVIF | Highly compressed images | Excellent compression but workflow/support considerations |
| SVG | Logos/icons/simple vector graphics | Not suitable for photographs |
For a typical WordPress site, WebP is a good default modern format, while AVIF is worth testing when your image optimization workflow supports it.
Don’t convert every image automatically without checking the result.
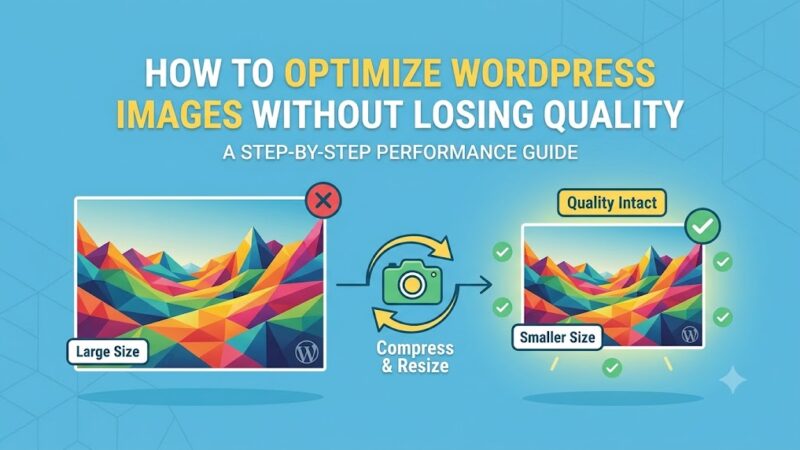
6. Compress Images
Image compression reduces file size while attempting to preserve acceptable visual quality.
There are two broad approaches.
Lossy compression
Some image information is removed to achieve a smaller file.
This is usually appropriate for photographs.
Lossless compression
The image is compressed without intentionally discarding image information.
This can be useful when preserving exact image data is important, although the resulting files may be larger.
7. Don’t Chase the Smallest Possible File
The smallest image isn’t necessarily the best image.
For example:
Image A
250 KB
Excellent quality

Image B
80 KB
Visible artifacts

Image C
500 KB
Very high quality
The 80 KB image isn’t automatically the best choice.
You want a practical balance between:
File size + visual quality + display dimensions
For photographs, compare the images at the size visitors will actually see them.
8. Choose the Right Image Quality
If you’re exporting JPEG images from an image editor, experiment with the quality setting rather than automatically choosing maximum quality.
For example, a photograph exported at:
Quality: 100
may be considerably larger than one exported at:
Quality: 75–85
while the visual difference may be difficult to notice at normal display sizes.
The exact quality setting depends on:
- Image content
- Encoder
- Dimensions
- Intended display
- Compression method
There is no universal “best” quality number.
9. Use WordPress’s Generated Image Sizes
When you upload an image, WordPress can generate several additional sizes.
Depending on your theme and plugins, you might end up with:
thumbnail
medium
medium_large
large
1536x1536
2048x2048
custom theme sizes
plugin-specific sizes
This is useful because different parts of the website can request appropriately sized versions.
However, plugins and themes can also register many custom sizes.
If a site has thousands of images and dozens of generated sizes, storage usage can become significant.
10. Don’t Generate Hundreds of Unnecessary Image Sizes
Some themes and plugins create additional image sizes automatically.
For example:
image-150x150.jpg
image-300x200.jpg
image-600x400.jpg
image-768x512.jpg
image-1024x683.jpg
image-1200x800.jpg
image-1536x1024.jpg
image-2048x1365.jpg
image-custom-1.jpg
image-custom-2.jpg
image-custom-3.jpg
Some may be required.
Others may never be used.
Before removing registered image sizes, determine whether your theme or plugins actually use them.
Deleting generated thumbnails blindly can cause broken images or unexpected behavior.
11. Use Lazy Loading for Below-the-Fold Images
Lazy loading allows images that aren’t immediately visible to be loaded later.
For example:
<img
    src="example.jpg"
    loading="lazy"
    alt="Example WordPress image"
>
This can reduce the amount of image data that needs to be loaded immediately.
WordPress supports native lazy-loading behavior for appropriate images in modern installations.
Good candidates for lazy loading
Images far down a long article are usually good candidates.
Don’t blindly lazy-load everything
Your main hero image or other important above-the-fold content may need to load immediately.
This distinction matters for performance.
12. Don’t Lazy-Load Your Largest Above-the-Fold Image
One common optimization mistake is applying lazy loading to the image visitors need to see immediately.
For example:
Homepage
↓
Hero section
↓
Large main image
If that image is important to the initial page rendering, delaying it can work against your performance goals.
Instead, identify your important above-the-fold image and make sure it is discoverable early.
This is particularly relevant when optimizing Largest Contentful Paint (LCP).
13. Optimize the LCP Image
Largest Contentful Paint, or LCP, measures how quickly the largest visible content element becomes rendered.
On many pages, the LCP element is an image.
For example:
Hero image
        ↓
Largest visible element
        ↓
LCP
If that image is:
3 MB
and loaded through several layers of JavaScript or a slow server, it can delay the page’s LCP.
For an important hero image, consider:
- Correct dimensions
- Efficient format
- Appropriate compression
- Fast delivery
- CDN
- Early discovery
- Avoiding unnecessary lazy loading
14. Use the Correct WordPress Image Size
When displaying an image in PHP, don’t automatically use the original full-size image.
For example, instead of:
the_post_thumbnail( 'full' );
you may be able to use a size appropriate for your layout:
the_post_thumbnail( 'large' );
Or a custom registered size:
the_post_thumbnail( 'article-featured' );
For custom themes, you can register an appropriate image size:
add_image_size(
    'article-featured',
    1200,
    675,
    true
);
Then use:
the_post_thumbnail( 'article-featured' );
This can prevent a 3000px or 5000px original image from being unnecessarily delivered into a much smaller container.
15. Don’t Forget sizes
Responsive images work best when the browser knows how much space the image is expected to occupy.
WordPress normally generates appropriate responsive image attributes for many standard image output functions.
For custom image markup, make sure you understand:
srcset
sizes
For example:
<img
    src="image-1200.jpg"
    srcset="
        image-480.jpg 480w,
        image-768.jpg 768w,
        image-1200.jpg 1200w
    "
    sizes="(max-width: 768px) 100vw, 1200px"
    alt="WordPress performance example"
>
The sizes attribute tells the browser how much space the image is expected to occupy.
16. Use Descriptive Alt Text
Alt text isn’t primarily a performance optimization, but it is an important part of image implementation.
For example:
<img
    src="wordpress-memory-error.jpg"
    alt="WordPress memory exhausted error shown in the browser"
>
Avoid stuffing keywords into alt text.
Bad:
alt="WordPress errors fix WordPress memory error WordPress tutorial"
Better:
alt="WordPress memory exhausted error shown in the browser"
If an image is purely decorative, an empty alt attribute may be appropriate:
alt=""
17. Use a CDN When Appropriate
A Content Delivery Network (CDN) can serve images from locations closer to your visitors.
Instead of:
Visitor
   ↓
Your web server
   ↓
Image
a CDN can provide:
Visitor
   ↓
Nearby CDN location
   ↓
Cached image
This can reduce latency, particularly when your visitors are geographically distributed.
Popular CDN/image optimization services can also provide:
- Image compression
- WebP/AVIF conversion
- Resizing
- Caching
- Automatic image delivery
But a CDN isn’t a substitute for properly sized images.
A badly optimized 5 MB image can still be a badly optimized 5 MB image when delivered through a CDN.
18. Consider Image Transformation at the CDN
Some image CDNs can dynamically transform images.
For example:
Original
4000 × 3000
could be transformed into:
Desktop
1200 × 900

Mobile
768 × 576
This can be particularly useful for websites with many visitors and large image libraries.
If you use this approach, make sure the resulting URLs are cacheable and that the transformation rules don’t create unnecessary variations.
19. Use an Image Optimization Plugin Carefully
WordPress has many image optimization plugins that can:
- Compress uploads
- Generate WebP
- Generate AVIF
- Remove metadata
- Optimize existing images
- Serve optimized versions
- Lazy-load images
- Optimize thumbnails
These tools can save time.
However, avoid installing several plugins that perform the same optimization.
For example, running:
Plugin A → WebP conversion
Plugin B → WebP conversion
Plugin C → Lazy loading
Plugin D → Image CDN
can create unnecessary complexity or conflicts.
Choose a workflow that fits your hosting and website.
20. Optimize Existing Images
Optimizing only new uploads won’t fix the images already stored in your Media Library.
If your website has been running for several years, you may have thousands of existing images.
Before running a bulk optimization process:
- Create a backup.
- Check available storage.
- Test on staging if possible.
- Process a small batch.
- Verify image quality.
- Check thumbnails.
- Check your frontend.
- Continue with the larger batch.
Don’t run a massive image conversion process on production without a recovery plan.
21. Remove Unused Images Carefully
Your Media Library may contain:
- Old logos
- Test images
- Duplicate uploads
- Unused featured images
- Old plugin assets
- Images from deleted pages
Removing genuinely unused files can reduce storage.
However, be careful.
An image may be referenced by:
- A post
- A page
- A custom field
- CSS
- JavaScript
- A theme
- A plugin
- An email template
- An external system
Don’t assume an image is unused simply because it doesn’t appear in the Media Library interface.
22. Don’t Use CSS to Shrink Huge Images
Consider this:
.hero-image {
    width: 600px;
}
while the actual image is:
5000 × 3000
The CSS changes the display size but doesn’t necessarily reduce the amount of image data downloaded.
A better solution is to deliver an appropriately sized image in the first place.
23. Avoid Background Images When an <img> Is More Appropriate
CSS background images are useful for certain design effects, but don’t automatically use them for every image.
An actual content image may be better represented using:
<img>
This gives the browser and accessibility tools more information about the content.
Background images can still be appropriate for decorative design elements.
24. Optimize Mobile Image Delivery
Mobile visitors often have:
- Smaller screens
- Slower connections
- Less available bandwidth
- More limited device resources
If your mobile design displays a:
500px wide image
there may be little reason to send a:
3000px wide image
Responsive image handling can help the browser select a more appropriate resource.
Test your pages on an actual mobile device rather than relying only on a desktop browser resized to a smaller window.
25. Test Images With PageSpeed Insights
After optimizing your images, test the actual page using Google’s PageSpeed Insights.
Look for recommendations related to:
- Properly size images
- Efficiently encode images
- Serve images in next-generation formats
- Defer offscreen images
- Largest Contentful Paint
- Network payloads
You can use:
Test individual important pages rather than only the homepage.
For example:
Homepage
↓
Blog article
↓
Category page
↓
Product page
↓
Landing page
Different templates can have very different image problems.
26. Check the Actual Image File Size
Don’t assume an image is optimized because it looks good.
Check its actual size.
For example:
hero.jpg
2.8 MB
might be excessive for its intended use.
After optimization:
hero.webp
180 KB
may provide a substantial reduction while remaining visually sharp.
The correct result depends on the image, dimensions, quality, and format.
27. Check Image Dimensions, Not Just File Size
File size isn’t the only important factor.
Consider:
Image A
300 KB
4000 × 3000

Image B
350 KB
1600 × 1200
Even though the file sizes are similar, Image A contains considerably more pixels.
If you only need a 1200px-wide image, the larger source may be unnecessary.
Optimize both:
dimensions + compression
28. Don’t Remove EXIF Metadata Blindly
Image metadata can include:
- Camera information
- Location information
- Date
- Orientation
- Copyright information
Removing metadata can reduce file size slightly, but don’t assume all metadata is useless.
If privacy is a concern, review whether uploaded photographs contain sensitive metadata such as GPS information.
For public websites, this can be more than just a performance consideration.
29. WordPress Image Optimization Checklist
Use this checklist when optimizing a WordPress website:
[ ] Determine the actual display dimensions
[ ] Resize oversized originals
[ ] Compress photographs
[ ] Use WebP where appropriate
[ ] Test AVIF where supported
[ ] Keep WordPress responsive images enabled
[ ] Check srcset and sizes
[ ] Lazy-load appropriate below-the-fold images
[ ] Avoid lazy-loading critical hero/LCP images
[ ] Use appropriate image sizes in theme templates
[ ] Avoid unnecessary full-size images
[ ] Review unnecessary generated image sizes
[ ] Consider a CDN
[ ] Optimize existing images
[ ] Remove genuinely unused images
[ ] Add useful alt text
[ ] Test mobile pages
[ ] Test important pages with PageSpeed Insights
[ ] Check Core Web Vitals
Common WordPress Image Optimization Mistakes
Uploading everything as PNG
PNG is not automatically better quality for photographs.
Using the full-size image everywhere
A large original image shouldn’t automatically be used for every thumbnail or content area.
Converting everything to WebP without testing
Modern formats are useful, but quality and compatibility still need to be checked.
Lazy-loading every image
Important above-the-fold images may need to load immediately.
Installing multiple optimization plugins
Overlapping optimization systems can create unnecessary complexity.
Optimizing only the homepage
Your blog posts, category pages, landing pages, and WooCommerce templates may have different image problems.
Reducing quality too aggressively
A tiny file with obvious compression artifacts isn’t a successful optimization.
Assuming a CDN fixes oversized images
A CDN can improve delivery, but it doesn’t eliminate the need for appropriate image dimensions and compression.
A Practical Image Optimization Workflow
For a typical WordPress website, use this process:
Original image
      ↓
Determine required display dimensions
      ↓
Resize image
      ↓
Choose appropriate format
      ↓
Compress image
      ↓
Upload to WordPress
      ↓
WordPress generates responsive sizes
      ↓
Browser selects appropriate image
      ↓
Lazy-load non-critical images
      ↓
CDN/cache delivers image
      ↓
Test actual page performance
This workflow is more effective than simply installing an image compression plugin and assuming the problem is solved.
How Much Can Image Optimization Improve Performance?
There is no universal percentage because the result depends on the website.
For example, suppose a page initially contains:
Hero image       2.0 MB
Content images   3.0 MB
Thumbnails       1.0 MB
-----------------------
Total images     6.0 MB
After resizing and compression, you might end up with:
Hero image       300 KB
Content images   700 KB
Thumbnails       200 KB
-----------------------
Total images     1.2 MB
That would represent a substantial reduction in image payload.
Your actual result may be very different.
Always measure before and after.
Frequently Asked Questions
What is the best image format for WordPress?
There isn’t one format that is best for every image. JPEG, PNG, WebP, AVIF, and SVG all have different uses. WebP is a practical modern choice for many websites, while AVIF can provide excellent compression when your workflow supports it.
Should I convert all WordPress images to WebP?
Not necessarily. Test your image workflow, quality, compatibility, and actual performance before converting an entire Media Library.
Is WebP better than JPEG?
WebP can often produce smaller files at comparable visual quality, but JPEG remains useful and widely supported. The correct choice depends on the image and your delivery setup.
Is AVIF better than WebP?
AVIF can provide excellent compression, but “better” depends on encoding time, image quality, browser support, tooling, and your site’s infrastructure.
Should WordPress images be lazy-loaded?
Images that are far below the fold are usually good candidates for lazy loading. Critical above-the-fold images should generally not be unnecessarily delayed.
What size should a WordPress image be?
The image should generally be large enough for the largest size at which it will actually be displayed, with some consideration for high-density screens. There is no single dimension that works for every website.
Does image compression improve SEO?
Faster pages can improve user experience and performance metrics, and page experience is one component of Google’s broader ranking systems. However, image compression should be done primarily to improve actual website performance and usability rather than as a guaranteed ranking trick.
Do I need an image optimization plugin?
Not necessarily. You can optimize images before uploading them and use WordPress’s built-in responsive image functionality. A plugin can make large-scale optimization easier, especially for an existing Media Library.
Should I delete unused WordPress image sizes?
Only after confirming that your theme and plugins don’t use them. Removing required image sizes can result in missing or broken images.
Final Thoughts
Optimizing WordPress images isn’t about making every image as small as possible.
It’s about delivering the right image, at the right dimensions, in an efficient format, at the right time.
Start with the fundamentals:
- Resize oversized images.
- Compress them appropriately.
- Use modern formats such as WebP or AVIF where they make sense.
- Keep WordPress responsive image functionality enabled.
- Use appropriate image sizes in your theme.
- Lazy-load non-critical images.
- Don’t unnecessarily delay important above-the-fold images.
- Consider a CDN for image delivery.
- Test your actual pages with real performance tools.
- Measure the results before and after optimization.
A well-optimized image workflow can reduce page weight significantly without sacrificing the visual quality of your website.