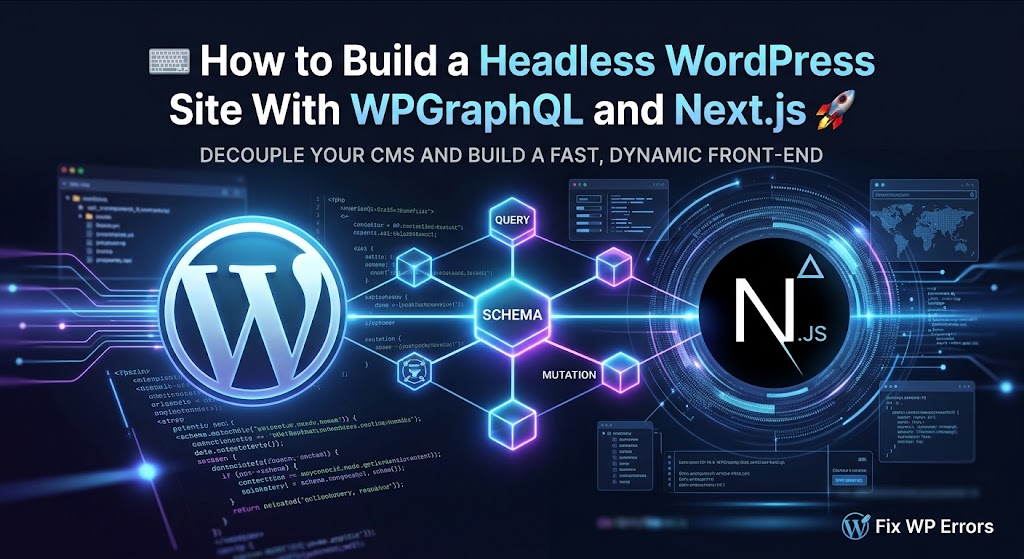
In a headless WordPress site, WordPress only manages content. Editors still write posts and build menus in wp-admin, but visitors never see a WordPress theme. A separate front end, here a Next.js app, fetches the content through an API and renders the pages itself.
I recently built exactly this setup: WordPress with WPGraphQL as the back end, a Next.js App Router front end, and automatic cache refreshing when editors save changes. This guide follows that build, including the parts that tripped me up, which most tutorials skip.
Should You Go Headless?
Headless is a good fit when you have a front-end team that works in React, need the same content in a website and an app, or want full control over front-end performance. It costs you a lot of what WordPress normally does for free:
- Themes, and most plugins that change the front end, such as page builders, form plugins’ front-end output, and SEO plugins’ tags, stop working directly. You rebuild those features in the front end.
- Previews, comments, search, and forms all need extra work.
- You run and deploy two applications instead of one.
If you only want some interactive React components on a normal WordPress site, you don’t need headless at all. See our guide to using React inside WordPress.
Part 1: Set Up WordPress as the Back End
Install WPGraphQL and fix permalinks
Install and activate the free WPGraphQL plugin. It adds a GraphQL endpoint at /graphql and a GraphiQL IDE in wp-admin for testing queries.
Then make sure Settings → Permalinks is set to anything except “Plain”. With plain permalinks, /graphql returns a 404. That was the first thing I hit.
Define menu locations in code
Menus in a headless site work best through locations defined in code, because the front end can depend on them. Editors can rename menus or swap which menu fills a location, and nothing breaks. Without a classic theme, register the locations in an mu-plugin, for example wp-content/mu-plugins/headless-menus.php:
<?php
add_action( 'after_setup_theme', function () {
    register_nav_menus( array(
        'header_primary' => 'Header Primary',
        'footer_legal'   => 'Footer Legal',
    ) );
} );
Then create the menus under Appearance → Menus and assign each one to its location. WPGraphQL exposes the locations as uppercase names, such as HEADER_PRIMARY.
Test queries in GraphiQL
Open GraphQL → GraphiQL IDE in wp-admin and run:
query HeaderMenu {
  menuItems(where: { location: HEADER_PRIMARY }, first: 100) {
    nodes {
      databaseId
      parentDatabaseId
      label
      uri
    }
  }
}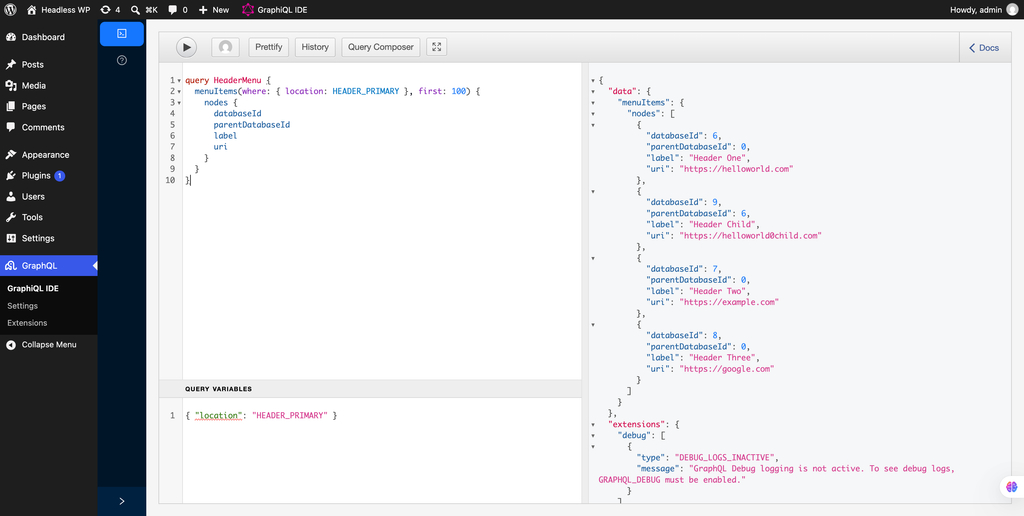
Test every query here before writing front-end code. If the data isn’t right in GraphiQL, it won’t be right in Next.js either.
Part 2: Build the Next.js Front End
Create the app
npx create-next-app@latest headless-frontend --typescript --app --eslint
cd headless-frontend
Add the GraphQL endpoint to .env.local in the project root:
WORDPRESS_GRAPHQL_ENDPOINT=http://your-site.local/graphql
REVALIDATE_SECRET=a-long-random-string
A small fetch helper
Create lib/wordpress.ts. Every request is cached for an hour and tagged, so it can be refreshed on demand later:
export async function wpQuery<T>(
  query: string,
  variables: Record<string, unknown> = {},
  tags: string[] = []
): Promise<T> {
  const res = await fetch(process.env.WORDPRESS_GRAPHQL_ENDPOINT as string, {
    method: 'POST',
    headers: { 'Content-Type': 'application/json' },
    body: JSON.stringify({ query, variables }),
    next: { revalidate: 3600, tags },
  });

  const json = await res.json();
  if (json.errors) {
    throw new Error(json.errors[0].message);
  }
  return json.data as T;
}
Because App Router components fetch on the server, the browser never calls WordPress directly. That also means you don’t need to configure CORS on WordPress for this setup.
Turn the flat menu list into a tree
WPGraphQL returns menu items as a flat list. Each item has a parentDatabaseId, which is 0 for top-level items, so the front end builds the nested structure. Match on databaseId, not on the id field. id is an encoded global ID that never matches parentDatabaseId, and that mistake gives you a menu with no submenus.
type MenuItem = {
  databaseId: number;
  parentDatabaseId: number;
  label: string;
  uri: string;
  children?: MenuItem[];
};

export function buildMenuTree(nodes: MenuItem[]): MenuItem[] {
  const byId = new Map<number, MenuItem>();
  const roots: MenuItem[] = [];

  nodes.forEach((n) => byId.set(n.databaseId, { ...n, children: [] }));
  nodes.forEach((n) => {
    const item = byId.get(n.databaseId)!;
    const parent = n.parentDatabaseId ? byId.get(n.parentDatabaseId) : undefined;
    (parent ? parent.children! : roots).push(item);
  });

  return roots;
}
Render posts
A single post page at app/blog/[slug]/page.tsx fetches by slug:
import { notFound } from 'next/navigation';
import { wpQuery } from '@/lib/wordpress';

type Post = { title: string; content: string; date: string } | null;

export default async function PostPage({ params }: { params: Promise<{ slug: string }> }) {
  const { slug } = await params;
  const data = await wpQuery<{ post: Post }>(
    `query Post($slug: ID!) {
      post(id: $slug, idType: SLUG) { title content date }
    }`,
    { slug },
    ['posts']
  );

  if (!data.post) notFound();

  return (
    <article>
      <h1>{data.post.title}</h1>
      <div dangerouslySetInnerHTML={{ __html: data.post.content }} />
    </article>
  );
}
The content field is the rendered HTML from the block editor. It doesn’t include the block styles a WordPress theme would load, so columns, buttons, and galleries look unstyled until you add CSS for them.
Part 3: Refresh the Cache When Editors Save
With an hour of caching, a menu or post change wouldn’t show for up to an hour. The fix is on-demand revalidation: WordPress tells Next.js when something changes, and Next.js drops just that cached data.
The Next.js side
Create app/api/revalidate/route.ts:
import { revalidateTag } from 'next/cache';
import { NextRequest, NextResponse } from 'next/server';

export async function POST(request: NextRequest) {
  if (request.headers.get('x-revalidate-secret') !== process.env.REVALIDATE_SECRET) {
    return NextResponse.json({ message: 'Invalid secret' }, { status: 401 });
  }

  const { tag } = await request.json();
  revalidateTag(tag, 'max');

  return NextResponse.json({ revalidated: true, tag });
}
In Next.js 16 and later, revalidateTag() takes a cache profile as its second argument. On older versions, pass only the tag.
The WordPress side
Add an mu-plugin that pings that route when menus or posts are saved. Define HEADLESS_REVALIDATE_URL (for example http://localhost:3000/api/revalidate locally) and HEADLESS_REVALIDATE_SECRET (the same value as REVALIDATE_SECRET) in wp-config.php:
<?php
function headless_revalidate( $tag ) {
    wp_remote_post( HEADLESS_REVALIDATE_URL, array(
        'blocking' => false,
        'headers'  => array(
            'Content-Type'        => 'application/json',
            'x-revalidate-secret' => HEADLESS_REVALIDATE_SECRET,
        ),
        'body'     => wp_json_encode( array( 'tag' => $tag ) ),
    ) );
}

add_action( 'wp_update_nav_menu', function () {
    headless_revalidate( 'menus' );
} );

add_action( 'save_post_post', function ( $post_id ) {
    if ( wp_is_post_revision( $post_id ) || wp_is_post_autosave( $post_id ) ) {
        return;
    }
    headless_revalidate( 'posts' );
} );
Tag your menu queries with 'menus' and your post queries with 'posts' in wpQuery(). Then save a menu in wp-admin and reload the front end: the change appears straight away. The request is non-blocking, so saving in wp-admin doesn’t wait for the front end.
Part 4: Lock Down the WordPress Front End
Visitors should only ever see the Next.js site, so stop WordPress from showing its own theme pages and let it serve only the admin and the API. A simple redirect in an mu-plugin handles it, with HEADLESS_FRONTEND_URL defined in wp-config.php:
<?php
add_action( 'template_redirect', function () {
    if ( is_preview() ) {
        return;
    }
    wp_redirect( HEADLESS_FRONTEND_URL . esc_url_raw( wp_unslash( $_SERVER['REQUEST_URI'] ) ), 301 );
    exit;
} );
Requests to wp-admin, /graphql, and the REST API don’t reach template_redirect, so they keep working. Also limit query depth in WPGraphQL’s settings, so very deep queries can’t overload the server.
Things I Ran Into
/graphqlreturned 404: plain permalinks. Switch to “Post name”.- Submenus didn’t nest: I built the tree on
idinstead ofdatabaseId. - Changes didn’t show in development, even after restarting: Next.js keeps its fetch cache in the
.nextfolder between restarts. Stop the dev server, delete.next, and start it again. - A hydration warning in the browser console: a browser extension was adding attributes to the page. Test in a private window without extensions before debugging your own code.
- “Port 3000 is in use”: an old dev server was still running in another terminal.
What You Still Need for Production
- Images: to use Next.js’s
Imagecomponent with images from WordPress, add your WordPress domain toimages.remotePatternsinnext.config. - SEO: your SEO plugin’s titles and descriptions need a WPGraphQL extension to reach the front end, and canonical URLs must point to the front-end domain, not WordPress.
- Previews: showing drafts needs authenticated GraphQL requests and Next.js draft mode.
- Forms: send submissions to a WordPress REST endpoint or a form plugin’s API.
- Hosting: WordPress on normal PHP hosting, ideally on a subdomain such as
cms.example.com, and the Next.js app on a Node-capable host such as Vercel or Netlify, with the environment variables and secrets set on both.
Summary
Install WPGraphQL, use pretty permalinks, define menu locations in code, and test every query in GraphiQL. In Next.js, fetch on the server with tagged caching, build menu trees on databaseId and parentDatabaseId, and render posts from their content HTML. Add a revalidation route and a WordPress hook so saves appear instantly, redirect the WordPress front end to the new site, and plan for images, SEO, previews, and forms before launch.